Gata Luna - Painting
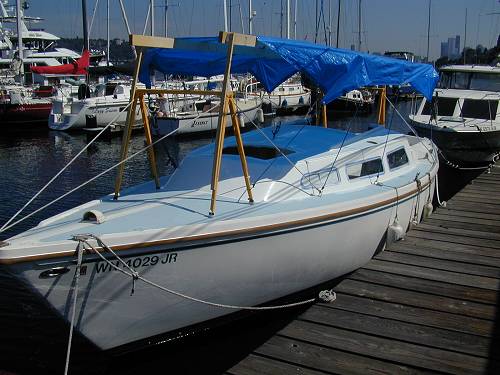 Prep Work Prep WorkWhen I started the bulkhead project, I figured since the mast was down I should paint the topsides. I had no idea what a huge project this would become. This meant pulling every stanchion, cleat, winch, and trim-piece off the deck. I then had to clean, patch, and sand every square inch before putting down a coat of primer and two coats of paint. In retrospect I probably should not have taken this on but I was naive and the deck sorely needed it so I proceeded blindly. This photo shows the tarp I erected over the boat while I was working on the cabin top. You can't paint in the sun so I needed to create my own shade. |
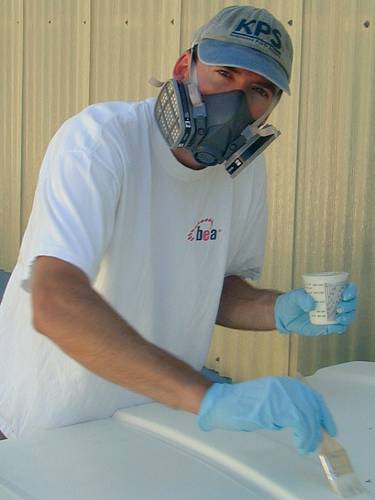 Yummy Chemicals Yummy ChemicalsAfter a lot of research, I ended up choosing the Interlux brand of paints. In a recent head-to-head test, Practical Sailor claimed the Interlux was just a good as the much more pricey Awlgrip paints. Since I was rolling it on in imperfect conditions, I figured it was silly to pay twice as much for the Awlgrip. I did, however, elect to use two-part rather than one-part paint for the white areas of the deck and the spars. The prep work is the same and the two-part paint maintains it's gloss and is stronger than the one-part paints. For the non-skid I decided to use the Interlux Intergrip one-part paint that includes a grit and a flattening agent. I chose this paint for 3 reasons: simplicity, because the color I wanted was available, and because I figured I would be repainting the heavy use areas in 5 years anyway so I should use something easy to apply. Each of the paints comes with it's own thinner and I used a de-waxing solution on the deck before I sanded it. All of these chemicals give off pretty noxious fumes so I went out and got the nicest 3M Volatile Organic filter mask I could find. You don't really know how well the mask works until you take it off and almost pass out from the fumes. A wise investment. Nice for varnishing the interior too. |
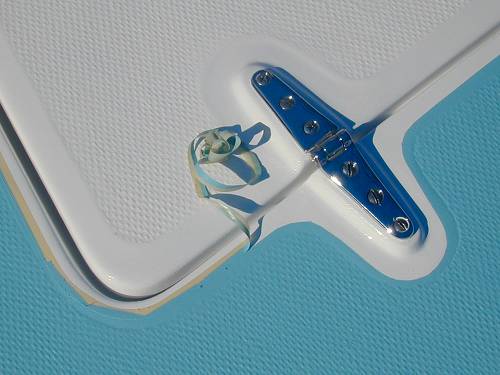
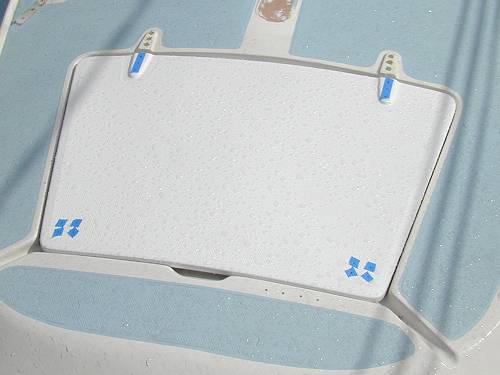 Forward Hatch Forward HatchI was fairly intimidated by these high-tech paints and didn't want to screw things up so I decided to start with the hatches. These were small and easy to work on and I figured if I messed them up I could always redo them. The forward hatch was first. I repaired some gouges, de-waxed it, sanded it, then primed it twice with an epoxy primer. I was then ready for my first coat of paint. You apply the paint with a foam roller then go over it again with a brush to even it out. I found a foam brush worked best. This paint is amazing, after you brush over it you can watch the lines disappear and the surface turn smooth. For the non-skid areas that I wanted white, I used some loose Interdeck grit mixed with the paint. Various sources claim you can sprinkle it over wet paint but that did not work well for me. I used about a teaspoon per ounce of paint and then rolled it on (no tipping with a brush required). I'm fairly pleased with the result. It looks bright white, washes easily, and provides a fair amount of traction without feeling like sandpaper. This photo shows the new hatch compared with the old, as yet unfinished deck. A recent rain has beaded up on the hatch as if it were waxed. The nice thing about polyurethane - you never have to wax it. |
 Topside Trim Topside TrimAt this point I've just finished the topside trim and the cabin sides. I'll need to wait a few days for the paint to fully cure before I tape off the non-skid areas and roll on the one-part nonskid paint. Already you can see the gleam in the new paint and the boat is starting to look very nice. The people on my dock are now starting to say "looking great" instead of "when do you think you will be done?". |
 Taping TapingAs they say, preparation is the key to success. Here you can see where I'm peeling back the tape that marked off the non-skid areas from the trim. I used 3M "Fine Line" tape to do the job. The narrow tape goes on first since it can stretch and lay down around corners. The key to get this to happen is to work sloooowly. This tape is too narrow to fully protect the trim so you need to add more width with additional tape. I like the 3M blue tape. Finally, after all this work it was time to roll out the first color on my boat. Like I mentioned earlier, I went with the Interlux Interdeck paint which is a single part polyurethane with the grit and flattening agent built in. You literally pour it out of the can and start painting - no thinning required. |
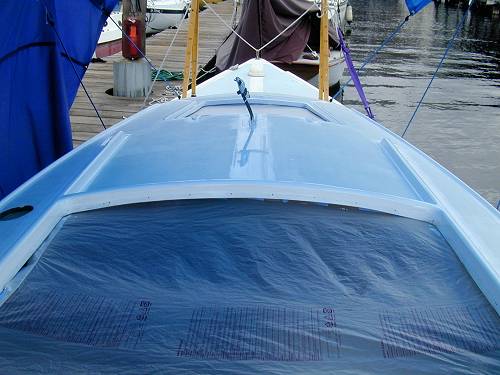
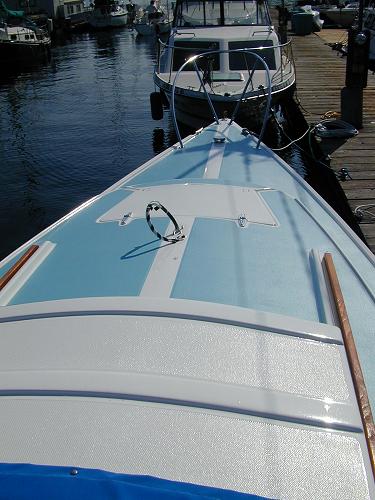
 Cabin Top Finished Cabin Top FinishedI rolled on two coats of Interdeck for my non-skid. They say to paint the second coat within two days of the first so they will bond. Then you need to wait for the paint to fully dry before you can put it to serious wear. For some reason, my paint took forever to dry - almost a week. It was very humid when I painted so that might have something to do with it. I am a bit concerned about the longevity of the one part paint. Were I to do it again, I would probably opt for mixing grit and flattener into the two part paint and using that. This photo shows the contrast between the now finished cabin top and the as of yet unfinished foredeck. |
 All Done All DoneI've got all the painting done now except the cockpit (which may have to wait until spring). It looks great and as I install the shiny new stancions, bow pulpit, and cleats it really gleams. |
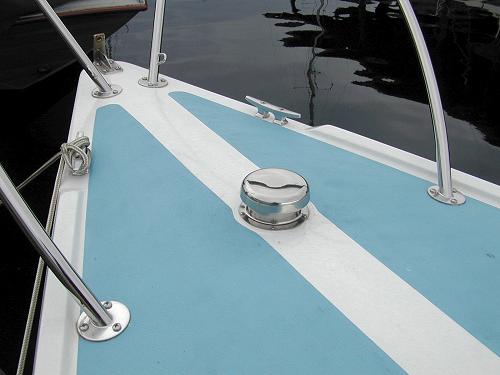 Foredeck ForedeckMy bow pulpit had been bent pretty badly in some earlier accident. After looking at having a new one built, I opted instead to buy another from the factory. The pulpit was fairly cheap - shipping was not since it had to be delivered by truck. Regardless the new pulpit looks much better and will protect my bow in the event of another collision. I also replaced my cleats (the old ones were corroded pretty badly) and installed large fender washers as backing plates to everything. Finally, I replaced my crappy old plastic vent with a nice new mushroom vent from Vetus. This vent has a screen (keeps out the spiders) and can screw open or closed easily from either inside or out. For now I plan to keep my anchor in a milk crate along with its rode. Someday I hope to install a proper anchor locker, bow roller, and hawse pipe. |
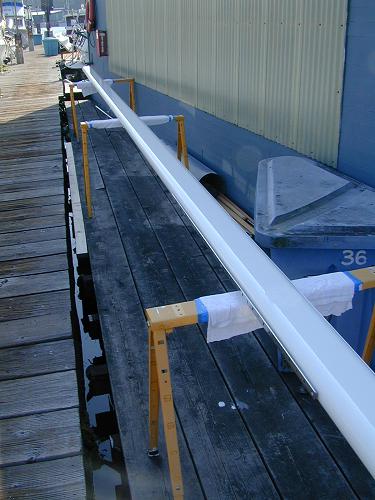 The Mast The MastSince the mast was down anyway I decided I couldn't put it back up looking ratty and grey so I painted it with the same two-part paint as the deck. It was fairly easy. First you grind off the existing corrosion and annodization with a wire brush in a high speed grinder. When you are done the mast will be shiny. Next you acid etch it with Alumiprep and the next day, give it a coat of a zinc based conversion coat. I used Viny-Lux Primewash from Interlux. You just roll a thin coat on and then roll on your primer a few hours later. I used the same primer and paint as the deck - Epoxy Barrier Coat and the Interthane two-part paint. Because the mast is often hit by hardware, etc., I put two coats of primer and three coats of paint. For the paint I just rolled in on. there is no need to tip unless you are a fanatic. The resulting finish looks like it was sprayed on. If you want to do this yourself, be sure to patch all the holes in the mast (using thickened epoxy) after the first coat of primer. Patching holes after the mast is fully painted is no fun. For more info on my mast project, see the Mast page. |
Restoration
Copyright 2004
Scott & Karen Semyan