Gata Luna - Bulkhead Repair
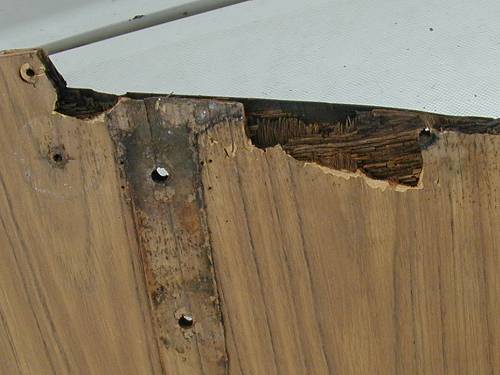 Rotten Bulkhead Rotten BulkheadThis is the problem that started the entire project. When we bought the boat, we noticed water damage under the deck opening for the chain plate. Poking with a screwdriver determined the entire top of the bulkhead was rotten. This is a common issue in these boats and some people have reported having the entire chain plate rip free. This is a good way to lose your rig over the side and unless you cut it free quickly as it bounces against the hull in the waves, a good way to sink the boat. To do this properly, I took the mast down. I had some work I needed to do on it anyway. Notice the fake-wood covering. I never liked that... |
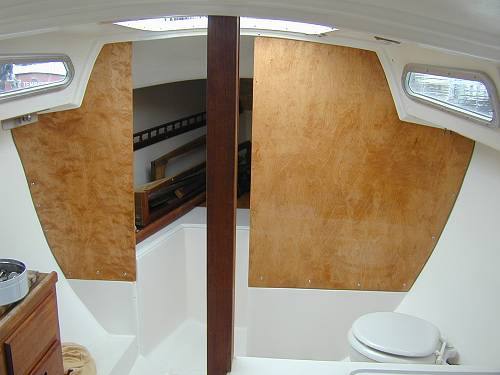
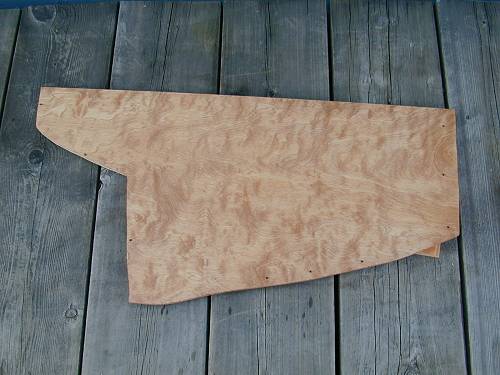 New Bulkhead New BulkheadSo, as I pulled out the one bulkhead, I started thinking. Rather than replace it with boring pine plywood, I decided to spend a bit more money and upgrade to a product called Eurobirch - an extremely strong marine grade plywood with a clean face. I bought mine from a Seattle company called Compton and paid about $60/sheet. You need refrain from stepping up from 1/2 inch to 3/4 inch since the thicker ply won't fit. The birch face is clean but fairly plain so I decided to use a cherry stain to bring out the grain. This is a photo of the stained bulkhead. Cutting it out was easy. Just lay the old one on the sheet of ply and use a saber saw to cut it out. After staining the bulkhead I put three coats of glossy spar varnish (minwax) on it. For interior you really don't need to use the spar varnish, but I had it anyway and figured it couldn't hurt. Spar varnish has more oil in it and is suitable for surfaces that are either going to be in the sun, wet, or subject to flexing. I figured anything on or in a boat met this criteria. |
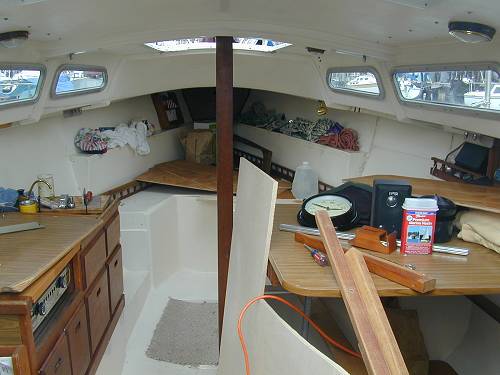 Bulkheads Removed Bulkheads RemovedThe one bulkhead turned out so nice that I decided I couldn't live with the other bulkheads and their dark fake-wood finish. So I decided to replace them all (this is how it always starts...) Here is a photo of the interior with all the bulkheads removed. I am constantly amazed at how spacious this boat is below. |
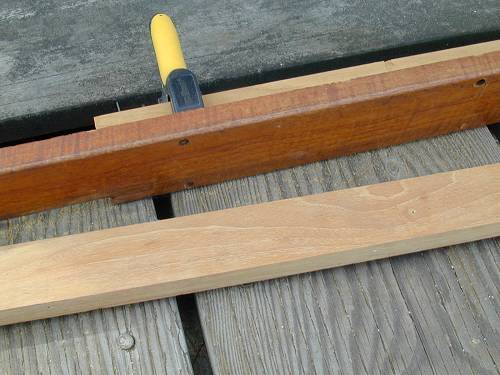 Sanding Teak Sanding TeakWith the bulkheads looking so nice and clean, I decided to refinish the interior teak. I sanded off years of grime and old oil and then refinished them with 3 coats of satin spar varnish (Minwax). A belt sander greatly eased this process. This photo shows the teak before and after a good belt sanding. The teak in the photo is actually the compression post which I ended up pulling out for other reasons. While I had it out, I decided to refinish it too. |
 Bulkheads Back In Bulkheads Back InHere are the first two bulkheads back in. It was a momentous occasion and I just had to take a picture. Note: the original forward bulkheads are slightly more narrow than 1/2 inch so you need to do a bit of work on the teak frames to get everything to fit. I think it's worth it. The 1/2 inch ply is much stronger (and better looking) than the original. |
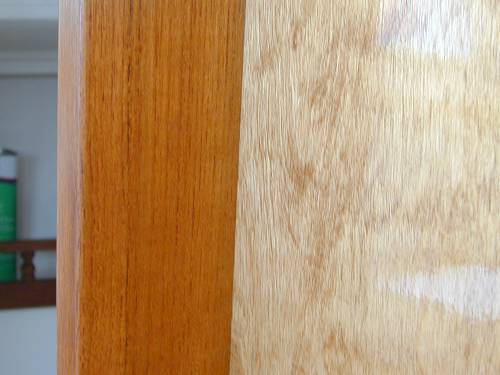 New Finish New FinishThis is a close up shot of the newly finished bulkheads and newly finished teak. I think the satin of the teak offsets the gloss of the bulkheads nicely. |
 Teak Rail Teak RailWhen I put the teak rail back on the hanging locker, I was reluctant to put the old rail up without refinishing it. It was easy to pop the rail apart and sand the top and bottom pieces, but what about the spindles? If I had a mini lathe, I would probably have tried to turn them clean. Instead I decided to buy new ones. My local wood supply store (Rockler) only had maple spindles and the guy there said teak spindles would be very rare. New teak railing would be almost $10/foot. So I got the maple spindles and tried various shades of stain on them. I ended up leaving them unstained and varnished them with the satin spar varnish I used on the teak. I think the new railing looks very nice and was relatively easy to do. By the way, the locker doors have not been refinished yet. That is a project for next winter... |
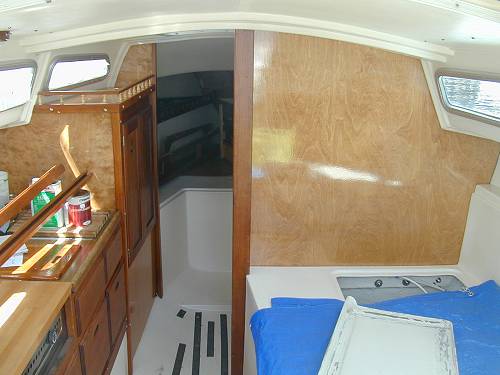 All Done (mostly) All Done (mostly)I finally put up my main bulkhead today (06/14/04). This was after taking out the compression post and refinishing it as well. That was a major project because the post would only come out once I took the back and side off. I needed it out to drill the hole for the mast electronics and coax which would run through the hollow compression post. I got the post back in, screwed it all back together and covered the holes with teak plugs. I then varnished it with the satin varnish and put the main bulkhead back in place. I really didn't want my screws backing out of the liner like they had in the past so I put a squirt of thickened epoxy in each hole before I drove the screws home. My new bulkhead project is mostly complete. After I paint the deck I'll drill out the holes for the chain plates, install them, and re-step my mast. |
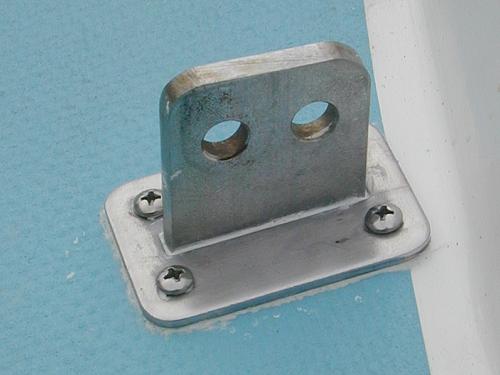
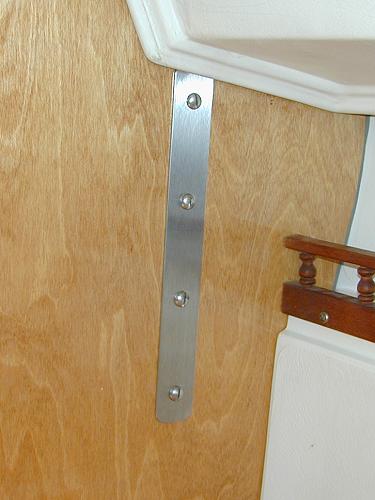 Chainplate Backing Plates Chainplate Backing PlatesThe original reason for doing the bulkhead replacement was the leaking chainplates. As I put the new bulkheads in, I wanted to make sure I solved that problem. Before installing the bulkheads I coated the ends in epoxy and also coated the holes I drilled in the bulkhead for the chainplate bolts. Originally there were only small washers backing the bolts. On other boats I had seen these washers dig into the plywood over time. To better spread out the load, I had a metal fabricator make backing plates out of stainless steel. Since they would appear in the salon, I had him put a brushed finish on them. I think they turned out fairly well. |
 Chainplate Installation Chainplate InstallationIn re-bedding the chainplates, I first filled the existing hole with thickened epoxy after scraping out all the old gunk and as much of the plywood core as I could. After I painted the decks, I re-cut the holes with a drill, saber saw, and Dremel (love that Dremel). The fit was a bit snugger, and I no longer had exposed plywood that might soak up leaking water. I then liberally coated everything with BoatLife polysulfide and screwed it all together. Wear gloves when you do this - its messy stuff. Acetone and paper towels cleaned up the slopover and Im left with a (hopefully) watertight fitting. |
Restoration
Copyright 2001
Scott & Karen Semyan