| World Trip Home | Our Van |
Before we left, I analyzed our power needs and decided that the single starting battery in the van would be inadequate. Behind the driver's seat is a compartment that is the perfect size for a deep cycle battery. I read all I could on how others had installed their battery, and then drew up a plan for our van. I even made a schematic. I wanted to be able to park in the middle of the desert for a week, be able to use the radio, plug the laptop in, etc. and not drain the starting battery at all. The following section details what I did. Exact part numbers, prices, and sources can be found in the Parts section.
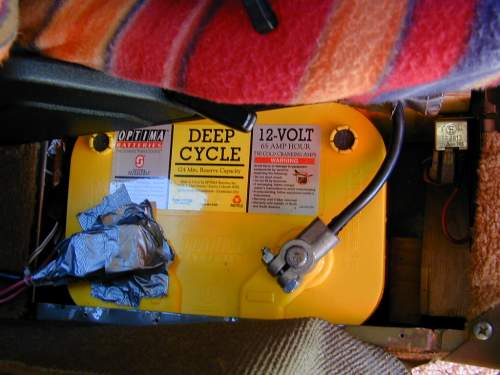
 Deep-Cycle Battery Deep-Cycle BatteryMany sources raved about the Optima Yellow Top Deep-Cycle batteries. Although pricey, these batteries use a spiral gell-cell technology that is far superior to normal flooded-cell batteries. They have a high capacity (rated 65 amp hours), don't need maintenance, and can even be set on their sides. I used the original relay (the refrigerator relay) to connect the battery to the van's charging system and isolate it from the starting battery (as detailed in Vanagon.com). Many people talked about cutting the compartment behind the driver's seat to be able to set the battery on its side. I found, however, that the battery fits just fine upright. The negative lead bolts to the available screw hole in the compartment and for positive leads, I ran many separate wires -- each with it's own 20 amp fuse. |
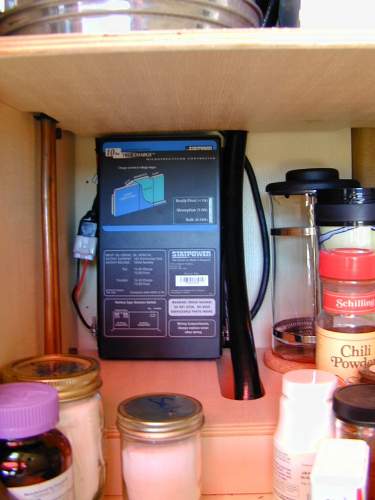
 In-line Charger In-line ChargerFor charging the Optima while we are plugged in to 'shore power' in a campground (or friend's driveway), I got a really nice in-line 3-phase battery charger from Statpower. Built to be wired straight into the electrical system full time, it charges while the van is plugged in and does not drain the battery in any way when not. It probably wasn't necessary but I knew the laptop and other goodies would be pulling a lot of power off of the deep-cycle and I figured it wouldn't hurt. After considering putting the charger in the compartment next to the water tank, I decided instead to put it under the sink. This gives it more air space in case it gets hot while charging and I am able to see what cycle it is on from the LEDs on the front panel. |
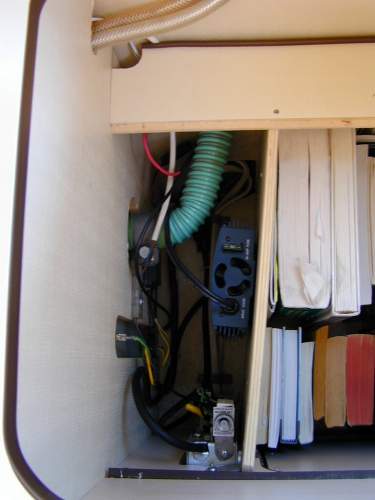
 Inverter InverterI also got a 300W inverter from Statpower. This gives me the ability to get 110V AC from my 12V DC system. Originally we were going to bring a coffee grinder and an electric toothbrush with us (both use AC). At the last minute we decided (correctly) that we needed neither, and I have yet to find a use for the inverter but it is there when I need it. I wired it directly into the system and then put a switch on the faceplate of the stove to turn it on when needed (you don't want it running all the time because there is a slight drain even when nothing is plugged in). I put the inverter in the space between the water tank and the cabinet to the left of the fridge. For outlets, I put the 10-amp shore power fuse on the inside of the cabinet (how often do you need to reset that?). This freed up an outlet that I could then wire to the inverter. In this photo, you can see how the plugs look now. The lower brown plugs are hot when I have shore power and the upper white plugs are hot when I turn on the inverter. Cool, huh? |
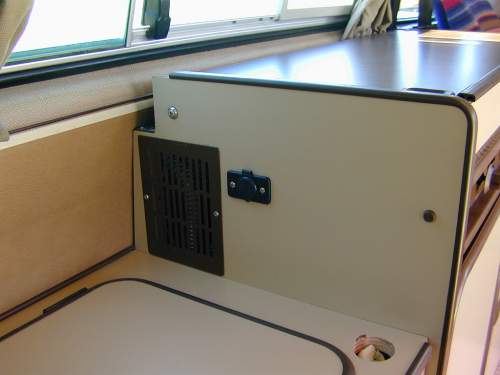
 Second Lighter Outlet Second Lighter OutletAs you will see in the next section, we have a lot of gadgets with us that run on 12-volt power using cigarette lighter type plugs. Because our only lighter outlet was in the front of the van connected to the starting battery, I installed a second outlet on the side of the stove. This is the plug I use when working on the laptop, charging the phone, etc. Like all the other things I have wired to the deep-cycle battery, this outlet has an in-line 20 amp fuse (safety first). |
Copyright 2000
Scott & Karen Semyan